Network Solutions, Inc. is proud to provide robust protection against SPAM messages. We know it is virtually impossible to use email without advanced spam protection because of the sheer number of messages that users can receive without it. Our built-in technology protects you against spam attacks and system-infecting viruses without resorting to 3rd party tools or services. The information below outlines some of the features and documents some of the procedures for working with spam messages.
Webmail Interface
Users can find their spam settings and options by going to the webmail interface located at https://webmail.internetpro.net. Users logging into the webmail interface are given a choice of logging into Tuxedo, Webmail Lite, or Mail Settings. Tuxedo is our most advanced webmail client which uses Ajax to provide a rich application-like experience including drag and drop, find-as-you-type address book, HTML message composing, and other features. Webmail Lite is a more simple webmail client which is designed for slower internet connections or for older, slower computers and web browers. Mail settings is a link directly to the user’s settings where changes to the spam settings can be made, autoresponders setup, and passwords changed.
New Philosophy
In the distant past, we at Network Solutions, Inc. made the decision to never actively delete messages we thought were spam. Instead, we tagged the Subject line with *****SPAM***** and allowed the end user to filter the messages based on that tag. However, times have changed, and people are now using more devices which don’t have good built-in filtering capabilities such as phones and tablets. Also, the volume of spam globally has increased an enormous amount since we started tagging spam. These days, people don’t want to see spam at all, so we’ve switched to a system which will try to keep the maximum amount of spam out of user inboxes.
How to Get the Biggest Benefit
No spam system is perfect, and what may be a spam email to one user could be a legitimate email to another. For instance, many spam messages talk about drugs (Viagra, Cialas, others) but if you are a doctor, you might need to see these messages. So, to get the biggest benefit from our system and to reduce the spam in your inbox requires a little work on the part of the user. The user should work to list email addresses which get quarantined or blocked as spam in their personal whitelist (accessible in the web interface). After a bit of training, users will find that very little legitimate email gets blocked. Then, they can bring more strict spam templates online to reduce spam even more. By using the non-quarantine templates, the messages considered as spam by the server will be rejected and spammers will begin to remove the user’s address from their spam lists. This will further reduce spam, eventually resulting in very little unsolicited email reaching the user.
So…How Do I Do This??
There are three basic interfaces to use to access the spam settings – Tuxedo, Webmail Lite, and Mail Settings. Below are screenshots for accessing the spam settings on all three:
1) First, decide which interface you want to uses as shown below: (via the webmail interface at https://webmail.internetpro.net)
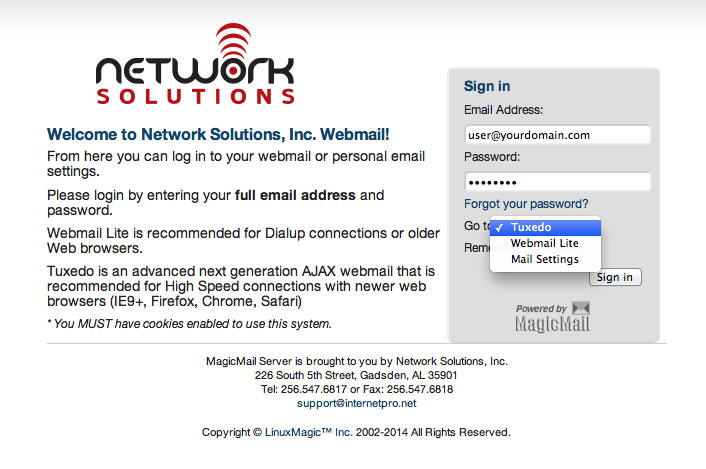
2) Click the link for the interface you chose to continue on to the instructions on how to whitelist senders/emails: Tuxedo – Webmail Lite – Mail Settings
Contact Info
Phone: 256-547-6817
Fax: 256-547-6818