Documentation

This category contains articles relating to setup and configuration of our different products and services.

Recommended DNS Settings

The Domain Name System (DNS) is the “phone book” of the internet.  Computers don’t understand web addresses like https://www.netsolinc.com.  They understand IP addresses.  In the same way that you use a phone book to retrieve a phone number by a person’s name, DNS changes web addresses into IP addresses. For instance, https://www.netsolinc.com gets changed to http://74.252.14.254.

The speed of your internet experience can be greatly influenced by DNS.  If your computer is taking a long time to look up names, then sites will load slower. Most pages will reference many addresses, and each of those addresses will need to be checked with DNS.  If DNS is slow, then each of those checks contributes to a slower page load.  For years, we at Network Solutions, Inc. have been utilizing a free service called OpenDNS.  OpenDNS is a company which provides free, fast, and reliable DNS.  They have some premium offerings as well, which can let you customize your internet experience.   The addresses of their servers are 208.67.222.222 and 208.67.220.220.  All you have to do to take advantage of their speed and reliability is use those numbers for your DNS servers.

Since the Domain Name System is basically your link to finding sites on the internet, it can also be used to filter bad sites.  OpenDNS also offers a free service call Family Shield.  To utilize this service, all you do is use 208.67.222.123 and 208.67.220.123 as your DNS servers.  Using those servers, sites with adult content, anonymizers, and phishing get automatically blocked.   Using this service, you can worry a lot less about what content your child is viewing on the internet.


We hope these suggestions can bring better performance and/or a safer internet experience for you and your computer.

2012-11-14T15:34:40-06:00July 15, 2010|Documentation, FAQ|Comments Off on Recommended DNS Settings

Setting up Email on iPhone or iPod Touch

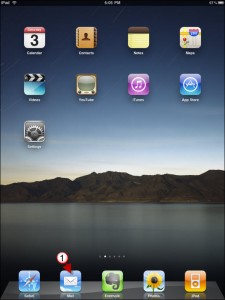
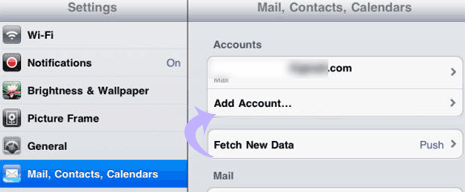
On your iPhone or iPod, tap Mail or from the Home screen choose Settings > Mail > Accounts > Add Account

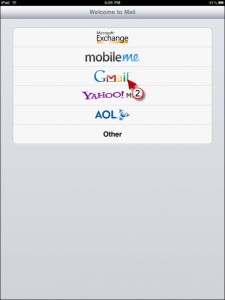
  1. It will show you a list of email account types.  Click Other
  2. Select a server type — IMAP, POP or Exchange.  We support IMAP or POP.
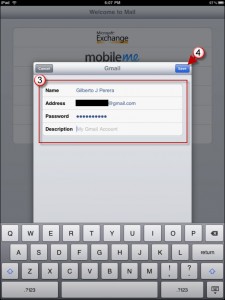
  3. Enter your account information:
    1. Enter your email address
    2. The email server type (IMAP or POP)
    3. Enter your incoming mail server: pop.internetpro.net for POP or imap.internetpro.net for IMAP
    4. Your username is your entire email address in all small letters
    5. Enter your email password.
    6. Enter your outgoing mail server smtp.internetpro.net
    7. Enter your user name and password for incoming and outgoing servers.  The outgoing server uses the same username and password as the incoming and these are REQUIRED.
2014-01-16T03:10:32-06:00June 29, 2010|Documentation, FAQ|Comments Off on Setting up Email on iPhone or iPod Touch

Setting up a vacation message / auto responder

Go to the Webmail Login at  https://webmail.internetpro.net

Log in with your email address and password and in the drop down box, choose “Tuxedo”. This procedure can be completed on all three choices, but the screenshots below are for the Tuxedo interface.

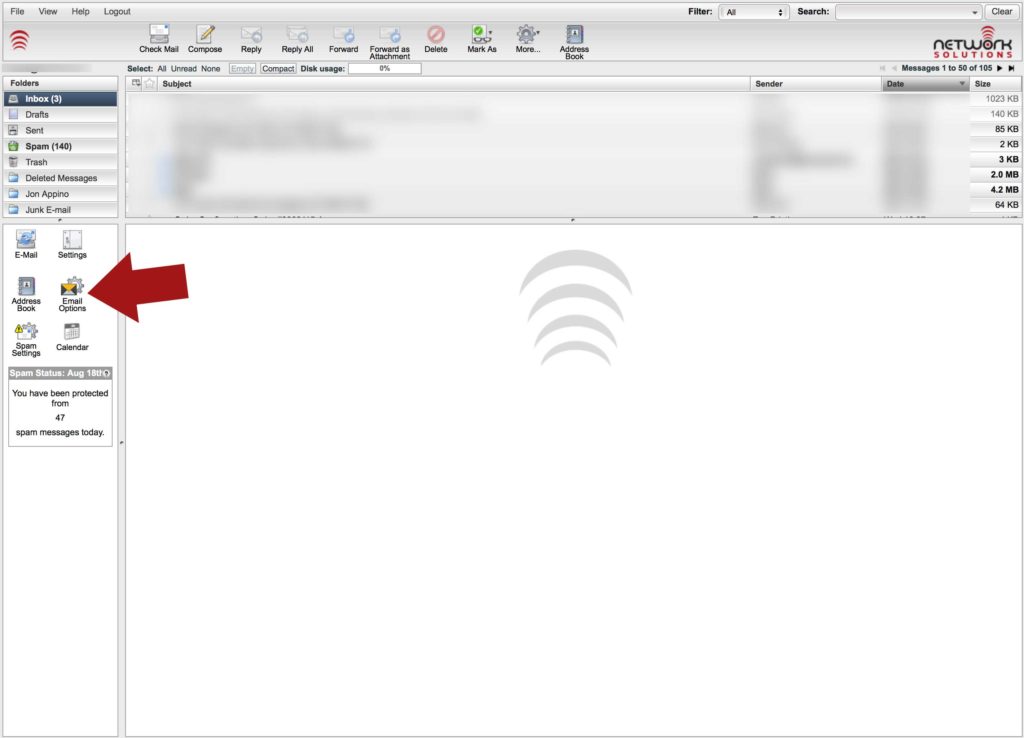
On the left, choose “Email Options” as seen below:

EmailOptions


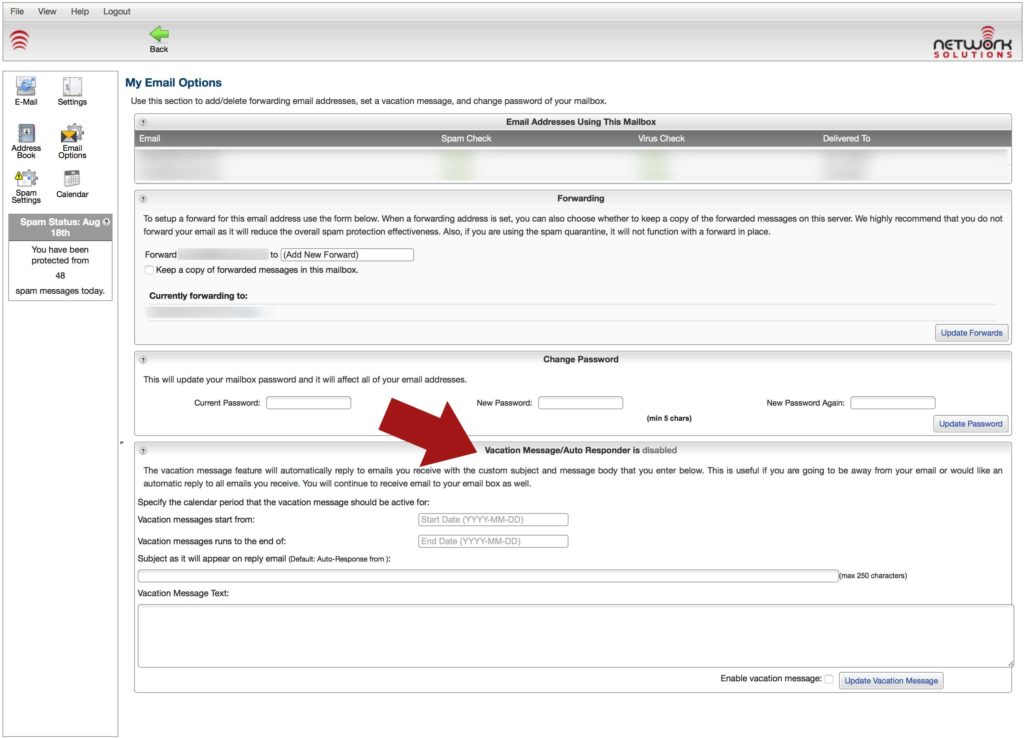
At the bottom of the next page, there is a section called “Vacation Message/Auto Responder” where you can set the start and end dates, enter the subject, and enter the message.  At the bottom is a check mark to enable it. Then, just hit the “Update Vacation Message” button.  See below:

AutoResponder


Thats it!  If you are still having trouble, feel free to send the message you want to apply to support@internetpro.net along with the dates you want it active.  We’ll set it up for you.


2016-08-19T12:41:47-05:00June 25, 2010|Documentation, FAQ|Comments Off on Setting up a vacation message / auto responder

Email Setup on Windows Live Mail

These are the instructions for setting up your Network Solutions, Inc. hosted email if you have Windows Live Mail for your email client.

1) Open Windows Live Mail by clicking on the icon.

2) On the left side of the screen, click “Add e-mail account”.

3) Fill in the blanks as shown in the pictures below, substituting your name and email address in the appropriate places.

4) Place a check mark next to “Manually configure server…”

5) Hit Next.

6) Fill in the blanks as shown below, substituting your mail server and email address where appropriate.  In the example, “yourdomain.com” will be substuted for the last part of your email address. For example, if your email address is support@internetpro.net, your mail servers would be mail.internetpro.net.

7) Make sure you change the login ID to match your entire email address. For example, using the above email address, if this blank reads “support”, you would make it “support@internetpro.net” (without quotes).

8 ) Outgoing server will be the same as incoming.

9) Place a check by “My outgoing server requires authentication”.

10) Change the 25 in the blank next to Port: to 587.

11) Hit Next.

12) Hit Finish.

You’re done!  If you have any questions, please don’t hesitate to contact us at 877-886-6868 or 256-547-6817.

2012-02-24T21:32:21-06:00June 8, 2010|Documentation, FAQ|Comments Off on Email Setup on Windows Live Mail

Email Settings

Customers of Network Solutions, LLC. at https://www.networksolutions.com, these are NOT your settings!

Our web-based email interface can be found on our home page or by going to https://webmail.internetpro.net

The web-based interface will allow you to choose one of three webmail clients (Tuxedo, New Tuxedo or Webmail Lite).  It will also allow you to change your email settings such as whitelists, blacklists, autoresponders, and password changes. Otherwise, please use the settings below to set up an email client (Outlook, Windows Mail, Thunderbird, Apple Mail, etc – we recommend using an email client instead of webmail).

Basic Email Settings

Incoming mail server name: imap.internetpro.net
Incoming mail server port: 143 using STARTTLS
* If no STARTTLS, 993 using SSL

Outgoing mail server name:  smtp.internetpro.net
Outgoing mail server port: 587 using STARTTLS
* If no STARTTLS, 465 using SSL

Incoming mail server is an IMAP server.
Outgoing server requires authentication (use same settings as my incoming mail server) – *do not select ‘Require logon using secure password authentication (SPA)’
User name or account name is entire email address (e.g. support@internetpro.net instead of just support)

iPhone/iOS Users please note:
Apple lists the outgoing server username and password as Optional, but they are NOT optional and must be filled out with the same information as the incoming server, including full email address as username and the corresponding password.

Additional Email Settings
Our email servers also handle POP if you prefer (not generally recommended):

Incoming mail server name: pop.internetpro.net
Incoming mail server port: 110 using STARTTLS
* If no STARTTLS,
995 using SSL

Some email clients may have SSL/TLS as an option rather than STARTTLS.  If that is the case, use the SSL ports below:

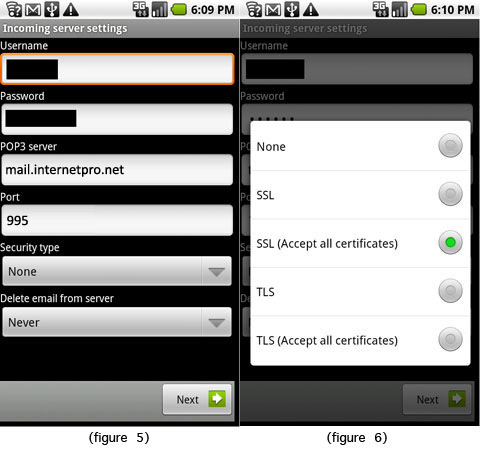
POP3 via SSL on Port 995
IMAP via SSL on Port 993
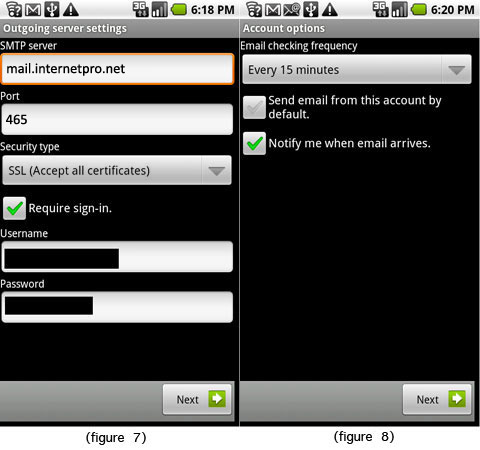
SMTP via SSL on Port 465

SPAM
Click this link for detailed spam filtering instructions including personal server-side whitelisting and blacklisting.

2021-12-02T13:48:03-06:00May 30, 2010|Documentation, FAQ|Comments Off on Email Settings
Go to Top